

Inside Apple’s Weather app
Apple’s Weather app has existed for a long time, and has evolved a great deal in the last few years — here’s everything you need to know to master the Weather app.
Apple’s Weather app shipped with the original iPhone in 2007. And, since 2007, it’s appeared on every iteration of the iPhone and the iPod Touch.
For the first seven years, Apple sourced its weather data from Yahoo! Weather. This was clunky, and awkward, as Yahoo! Weather used data from The Weather Channel to provide data to Apple.
That hand-off didn’t last that long, though, relatively speaking.
From iOS 8 until iOS 15, Apple cut out the middle man and used The Weather Channel’s data directly.
In 2020, Apple had acquired the popular weather app, Dark Sky. By 2021, many of Dark Sky’s features had been rolled into Apple’s weather app as part of iOS 15. In 2024, the standalone Dark Sky app was removed from the App Store.
With the advent of iOS 16 in 2022, Apple began collating its weather data across several sources. According to Apple, this includes Breezometer, The Weather Channel, the National Weather Sevice and National Oceanic and Atmospheric Administration, and many regional and country-specific weather data sources.
While the Weather app has spent almost eighteen years on iPhone, it’s had a much shorter run on Apple’s other platforms. In fact, it wouldn’t appear on both iPad and Mac until 2022, as part of iPadOS 16 and macOS Ventura, respectively.
Apple Weather — The Interface
Weather is a relatively straightforward app compared to other apps on offer. When you open the app, Weather will use Location Services to get the forecast for your current location.
At the top of the app, you’ll see the current temperature and conditions and the high and low for the day. The background of the weather app will change to reflect the weather in real-time.
If there are any severe weather alerts or imminent precipitation, they will appear directly under the temperature.

Apple Weather details
Below that, you’ll find the hourly forecast, which gives you a quick look at what temperature and conditions you can expect for the next 24 hours. And below that, you’ll find your 10-day forecast.
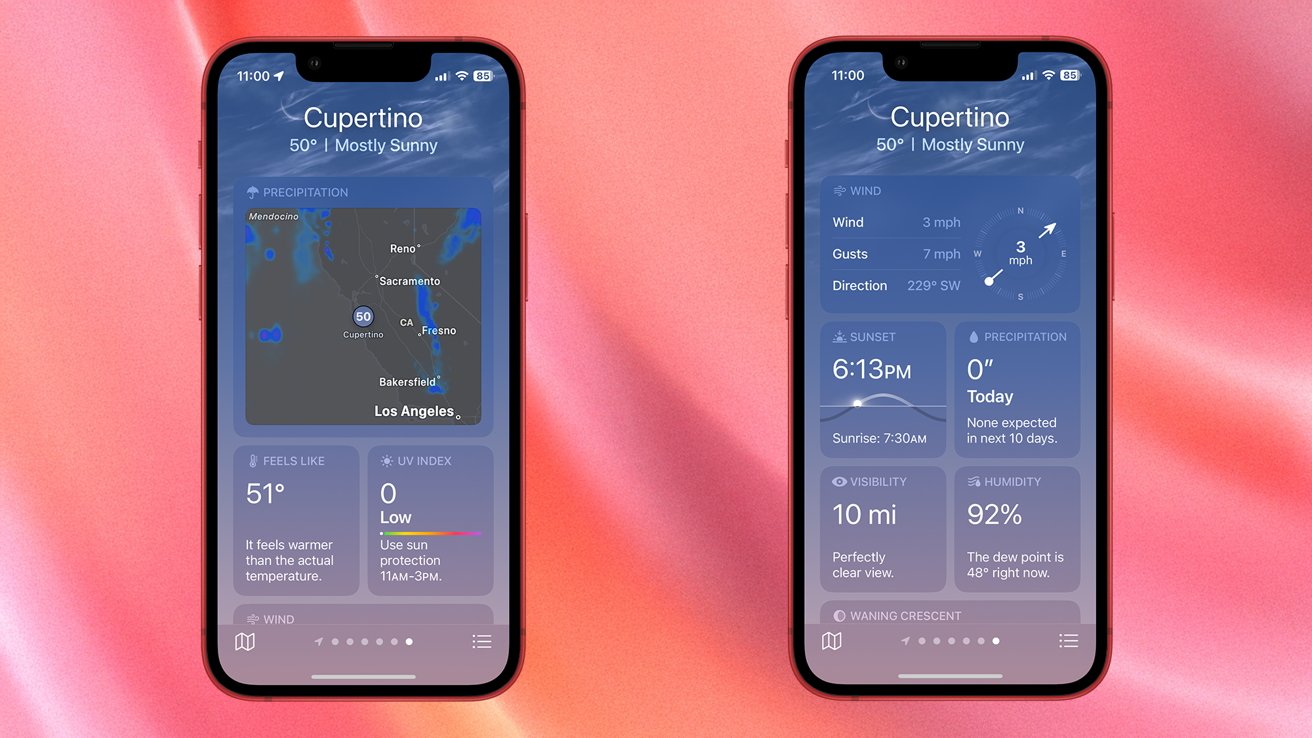
Scrolling further down gets you a few more widgets. This includes your Air Quality Index (AQI), precipitation map, Feels Like temperature, and UV Index. Even further down is a box denoting wind conditions, your sunrise/sunset time for a specific location, precipitation predictions for the next 24 hours, visibility, and humidity.
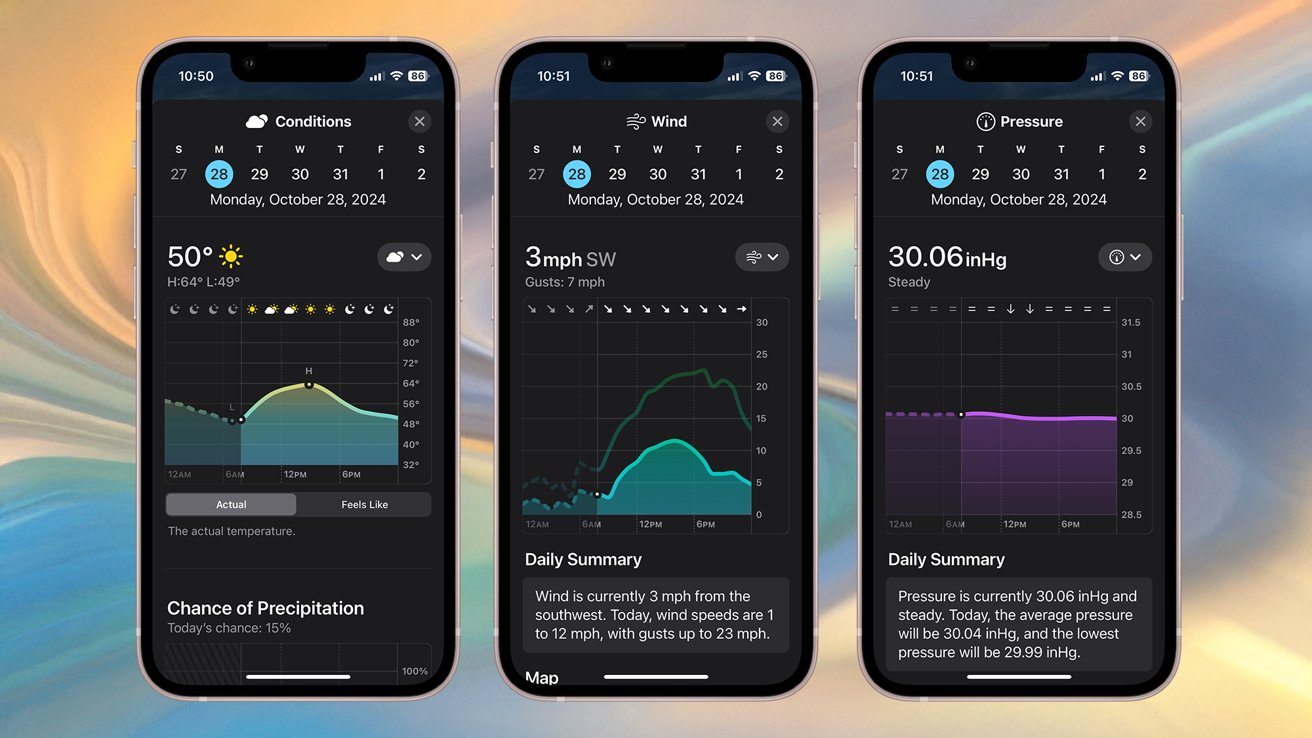
Tapping on details will bring up additional information
Finally, at the bottom, you’ll see information about the phases of the moon, the current temperature compared to the historical average, and the barometric pressure.
Tapping many of these details will bring up additional information, too.
Using Apple Weather
Using the Weather app is fairly easy. While you can launch it directly from the app icon, you can also set up Weather to be a widget on both your Lock Screen and your Home Screen. This is convenient if you want to monitor the weather at a glance.
However, you can also customize the weather app in a few key ways.
Adding additional cities is done by clicking the hamburger menu in the lower right corner. Cities can be added using city or airport codes. Once added, you can simply swipe left and right to view the additional locations.
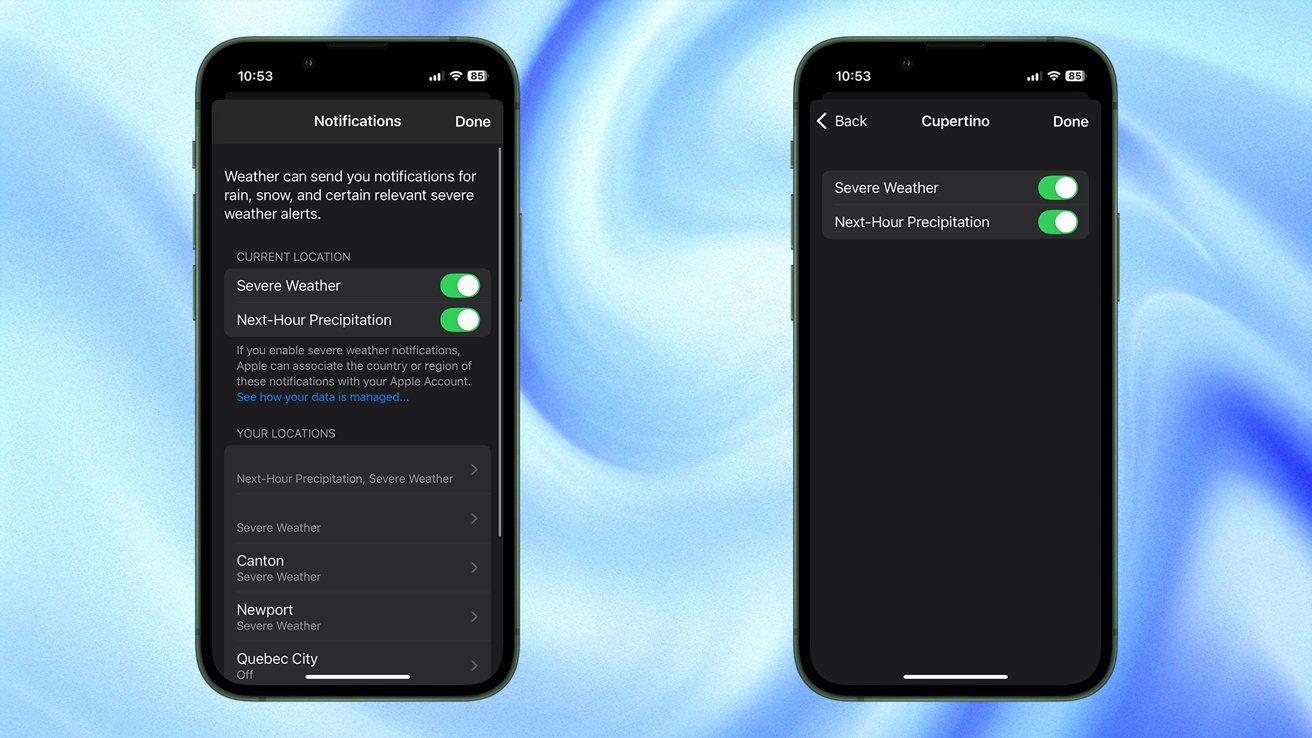
Setting up weather notifications
From that same screen, tapping on the … menu will bring up the ability to turn on notifications for next-hour precipitation and severe weather. These can be enabled for each individual location.