

Job hunting is a stressful and draining process. You spend hours filling out one application, tailoring your resume, and writing—grinds teeth—yet another cover letter that shows how your shining personality is only outdone by how awesome you are at your job.
Fortunately, with the help of Zapier Agents, you can get AI to do the heavy lifting for you. That’s because Zapier Agents lets you train digital teammates to work independently across 7,000+ apps—and use live data as a knowledge source.
That means you can build a dedicated agent that writes personalized resumes and cover letters to match any job description based on your experience. It can even carry out tasks in your favorite apps for you, like emailing resumes or collecting accomplishments from Slack.
Watch Zapier’s Emily Mabie build a job search agent in the video below. Or keep reading for step-by-step instructions.
Note: This video references Zapier Central, which has now been rebranded as Zapier Agents. Want to see how we’ve reimagined the way AI should work for you and your team? Check out what’s new here.
Jump ahead
Zapier Agents is currently available in beta. Try it now.
Set up your agent
To start building your dedicated AI agent, follow these steps:
-
First, head over to agents.zapier.com and sign up.
-
When the portal opens, click + New agent. This will open up your assistant in Agents, where you can finish setting it up.
-
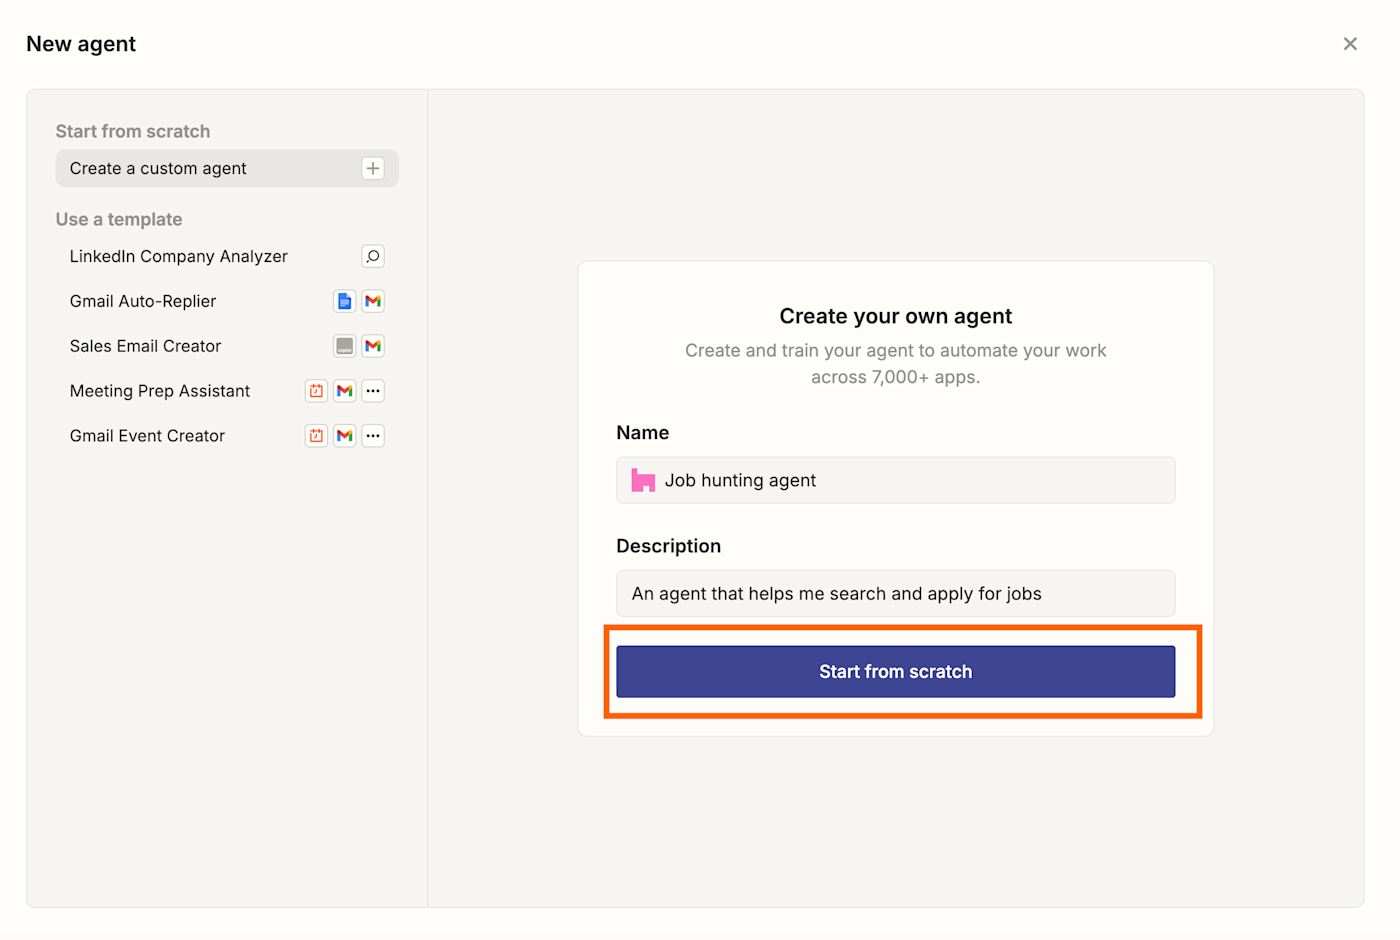
To start with, a window will appear where you can give your assistant a name (like Job hunting agent) and a description. When you’ve done that, click Start from scratch.

-
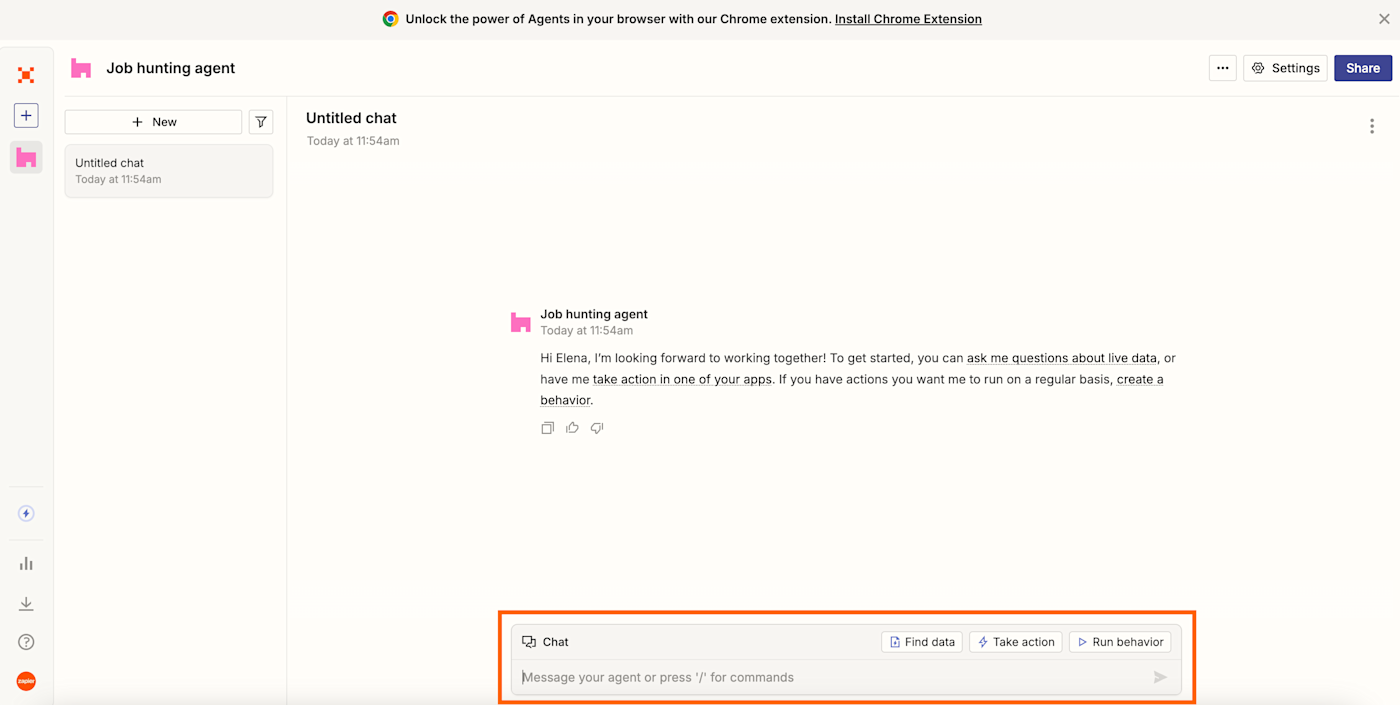
This will lead you to the chat interface, which allows you to chat with your agent just like you would with a coworker on Slack. This is where you’ll tailor its knowledge, run behaviors, and ask it to carry out tasks in other apps on demand or automatically.

Instruct your assistant’s behavior
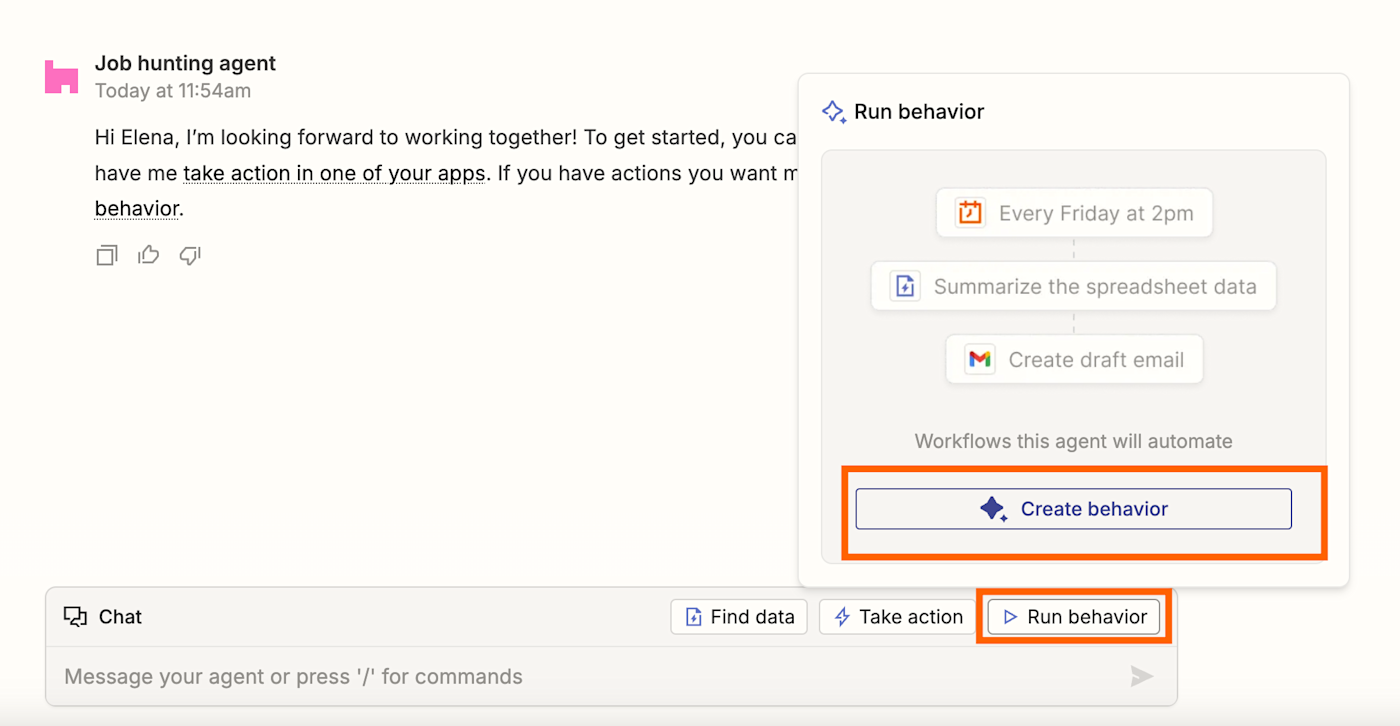
Next up, you’ll want to define your agent’s behavior. This means defining the triggers and rules for when it should step in and let it perform actions in other apps independently or on demand.
In this instance, we’re going to instruct the agent to add your weekly accomplishments to a Google Doc. In your current role, you might post weekly or monthly updates of all your achievements in Slack, for example.
You can run a behavior that dictates whenever you add an emoji to that Slack message, your agent will take those accomplishments and convert them into bullet points. Finally, it will add those bullet points to a Google Doc in Markdown formatting. That way, your agent can use that Google Doc as a data source to write your future resumes. (We’ll show you how to upload this data source later on.)
For now, follow these steps:

-
For your trigger step, select Slack, then select New Reaction Added. Connect your account, then follow the instructions to set up the rest of the fields.
-
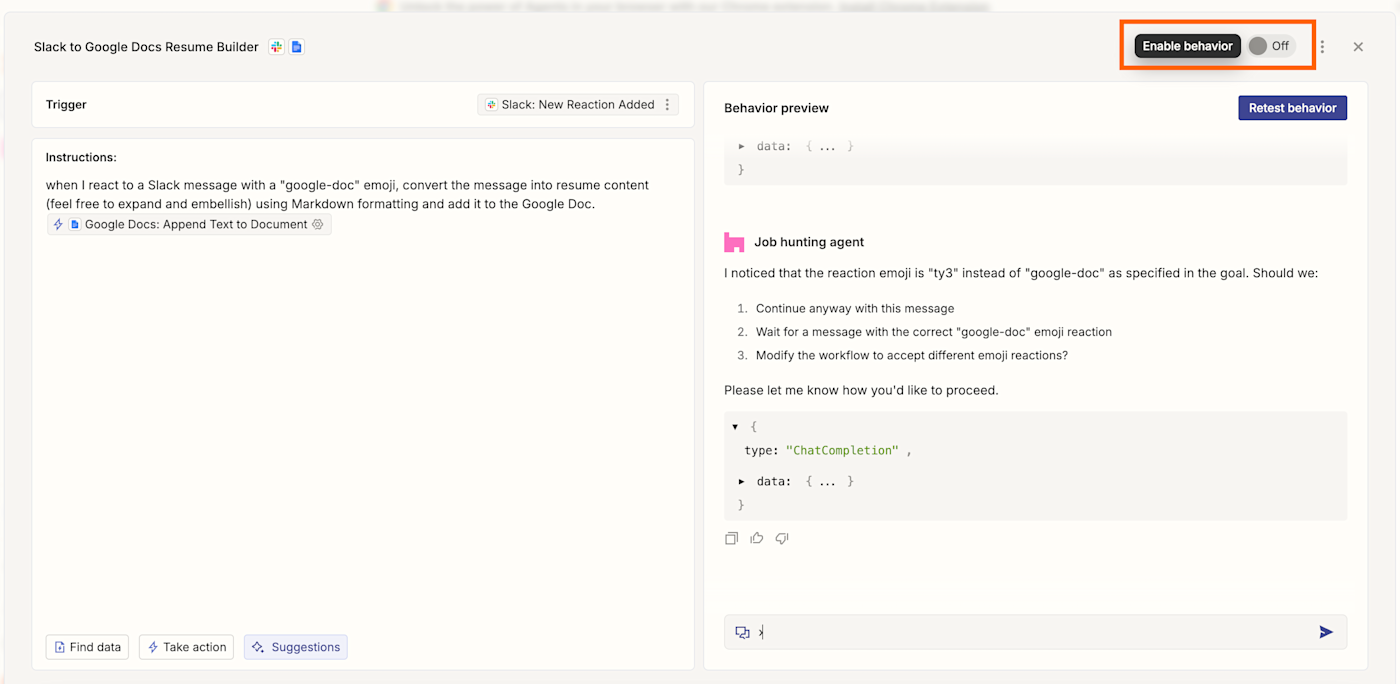
In the dialog box, under the Instructions field, describe what you want the assistant to do in simple terms. In this case, you can add something like when I react to a Slack message with a “google-doc” emoji, convert the message into resume content (feel free to expand and embellish) using Markdown formatting and add it to the Google Doc.
-
For your action step, click the Take action tab, then select Google Docs as your action app and Append text to document as your action event. Select the document where you want to store your weekly list of accomplishments, and follow the instructions to set up the rest of the fields.
-
Once you’ve done that, click Save instructions & test, then switch it on.

Add your data sources
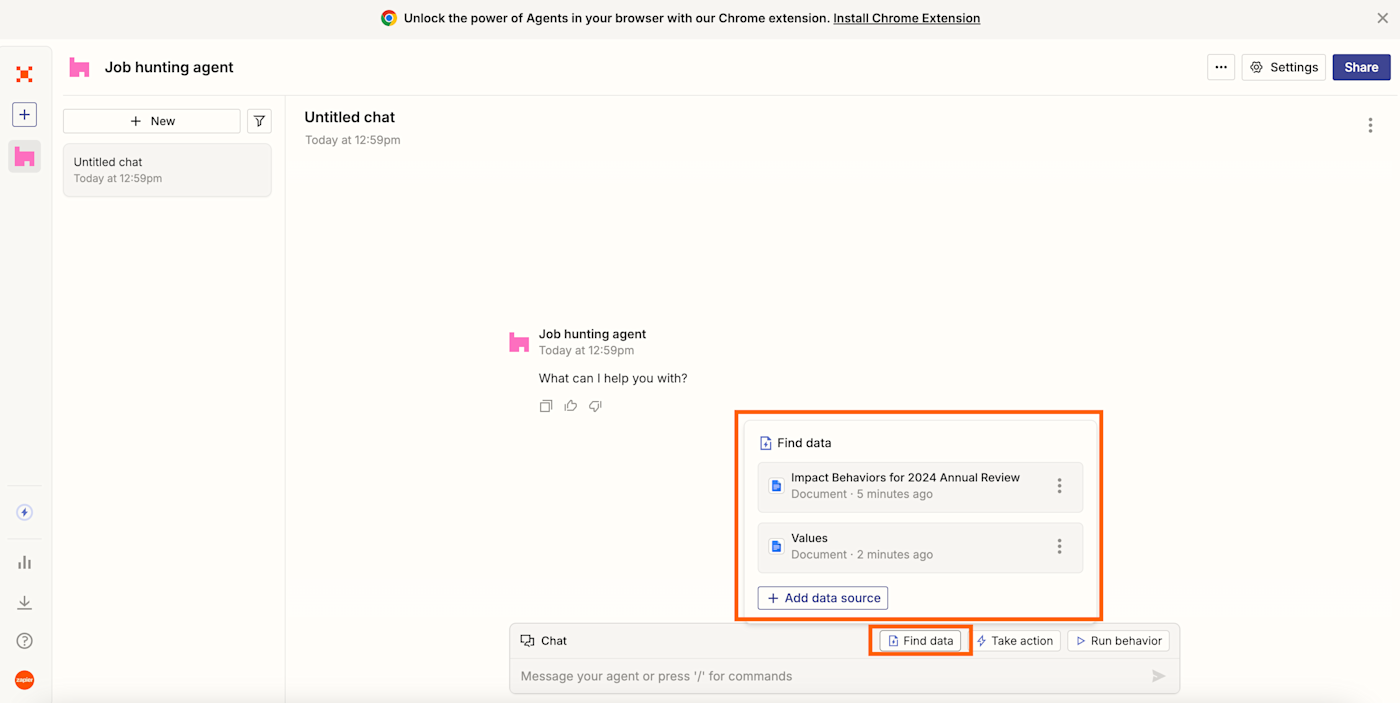
Next up, it’s time to add your data sources to the agent. You can give your bot access to live data (like a table or a Google Doc) so that it can find, analyze, and summarize information when you ask for it.
In this case, we’ll want to add as much information about your current job role, your past achievements, and your professional experience.
That means we’ll be adding the Google Doc you set up to list your weekly accomplishments. You can also add past resumes, cover letters, and anything else you think your agent should know.
To add your data sources, follow these steps:
-
Give your agent a data source. Click Find data and + Add data source in the initial chat message.
-
In the dialog box, select Google Docs from the menu of options.
-
Select an existing connection for the app or connect a new one.
-
Next, select a document to use as the data source. After you select your list of accomplishments, click Add data source.
-
Follow this same process for any other data sources.

Add more actions
Next up, you can add other actions to your assistant. This refers to simple actions (or tasks) your assistant can execute on command across different apps when you converse with it. Actions are different from behaviors because they don’t require an event happening first, like in another app or on a set schedule.
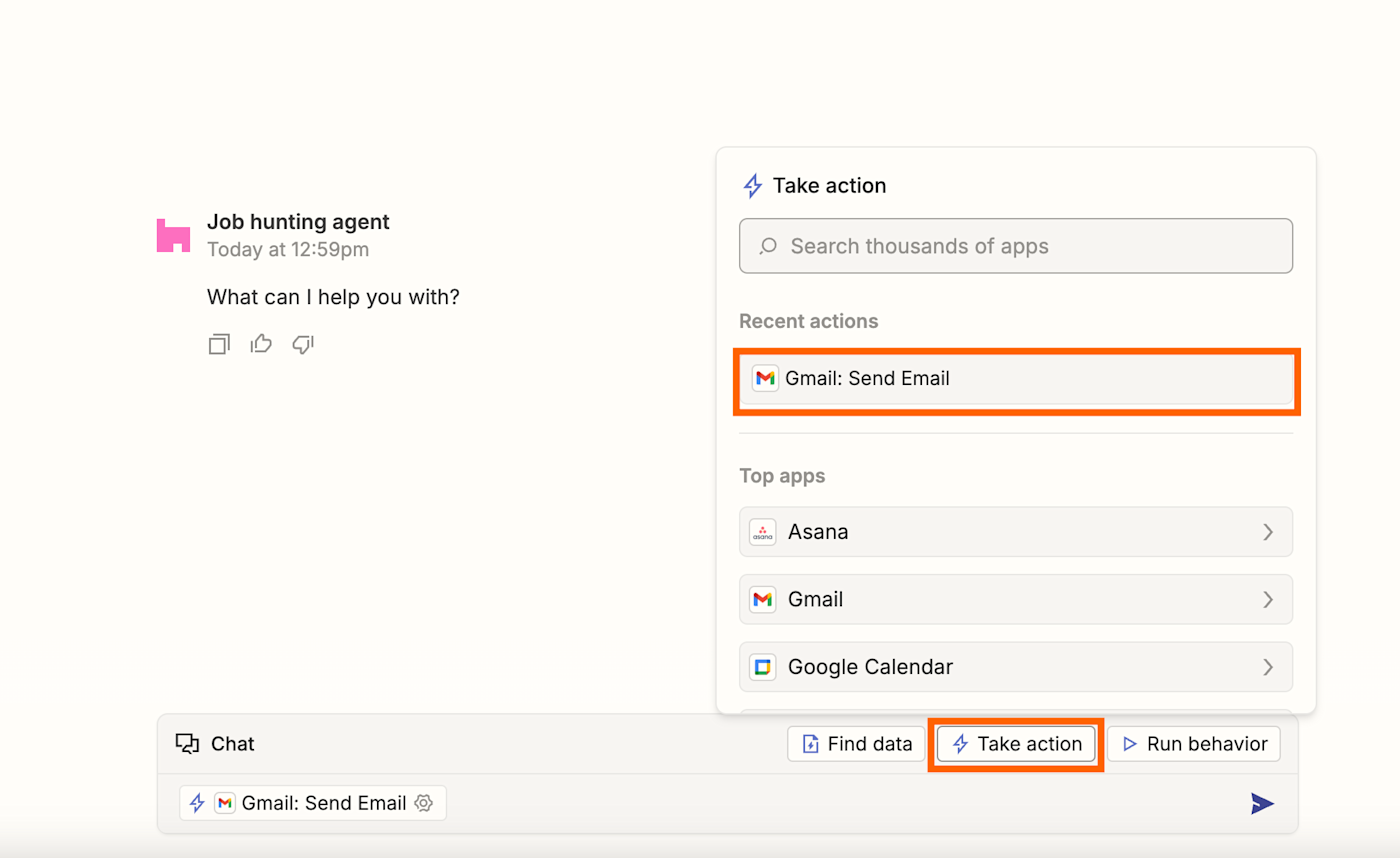
You might set up an action for Gmail, for example, so that once your assistant has written a resume, you can ask it to email you—or the hiring manager—a copy.
To set up this action, follow these steps:
-
Click Take action in the initial chat message, then search for and select Gmail from the available options.
-
Select Gmail: Send Email as the action.
-
Next, select an existing connection for the app or connect a new one.
-
Once you’ve done that, follow the instructions to finish setting up the rest of the fields.

Your agent should now be ready to help with your job search—though you can refine it as much as you like until it’s perfect. Next time you come across a great job role on LinkedIn, you can ask your assistant to write a resume that matches the description—and pulls from all of your accomplishments listed in your data sources.
Tip: Download the Zapier Agents Chrome Extension to bring your job hunting bot anywhere with you on the internet while you search for jobs—like LinkedIn.
Build agents with Zapier Agents
With Zapier, you can build AI teammates to handle routine tasks across your entire tech stack while you tackle the strategic work that grows your business.
Have another task that could use streamlining? Start experimenting with Agents today and see what you can build.
Learn more: For more information on building an agent with Zapier Agents, check out our feature guide.
This article was originally published in June 2024. It was most recently updated in January 2025.